Java programming language
Software testing
Integration tests and continuous integration
Once the unit tests have been designed and run, it’s time to start integrating the different components of the application. This is when continuous integration can come into scene…
1. Principles of continuous integration
Continuous integration is a testing methodology that automatically launches a set of tests every time we try to integrate or join the components of an application. This way, every time we make a change in our project and upload the changes, a tool is in charge of launching the tests that we have defined (typically unit tests for each component) and determine if anything is going wrong. This methodology can also be helpful in a team environment, so whenever a team component uploads changes to a common repository, tests are automatically launched and every team member can notice if anything goes wrong.
1.1. Tools for continuous integration
There are several tools that we can use in order to include continuous integration features in our projects. For instance:
- GitHub Actions is a tool integrated with GitHub that lets us perform this integration tasks automatically.
- Travis CI is an external, open source tool that can be integrated with GitHub so that we can choose which project(s) are included in the continuous integration process.
- Jenkins is another external CI tool written in Java that can also be integrated with GitHub and some other control version tools.
- Circle CI is another external CI tool that can be integrated with some version control software, such as GitHub.
Some of these tools offer a limited free account that let us perform some integration tests per month. For the purpose of this session, we are going to rely on Circle CI as our preferred tool.
1.2. Using a dependency manager: Gradle
Most of the tools mentioned above use some default configuration files based on some dependency manager. A dependency manager is a tool that automatically looks for dependencies or external resources needed in a project to compile and/or run. Regarding Java projects, we can mention Gradle or Maven as some of the most relevant dependency managers.
In order to ease the continuous integration in a remote, shared repository, we should create our Java project based on some of these dependency managers. In our case, we are going to use Gradle in the example shown in this session. So we create a new IntelliJ project and choose Gradle in the first section of the project wizard:
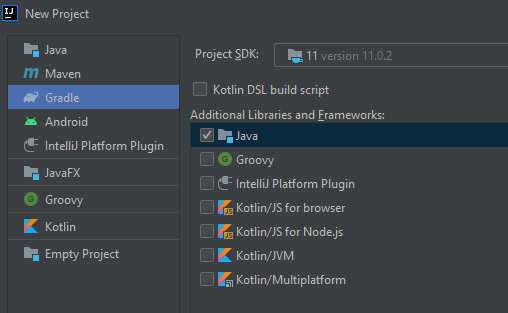
For the purpose of this session, let’s create a project called SampleCITest. When we finish creating the project, Gradle will automatically build it for the first time (it may take a few seconds/minutes).
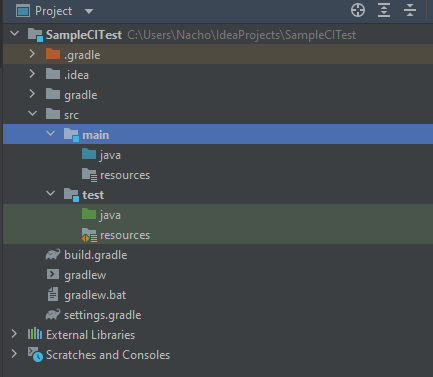
As you can see, Gradle automatically adds a src folder to include our source files, with a subfolder called main for the main source code and a test subfolder to automatically place the test classes.
Now, let’s add a new package called data in the src/main/java subfolder, with a Person class inside with this code:
package data;

public class Person
{
    private String name;

    public Person(String name)
    {
        this.name = name;
    }

    public String getName()
    {
        return name;
    }
}
Next, click on the class name and press Alt + Enter to create the associated test:
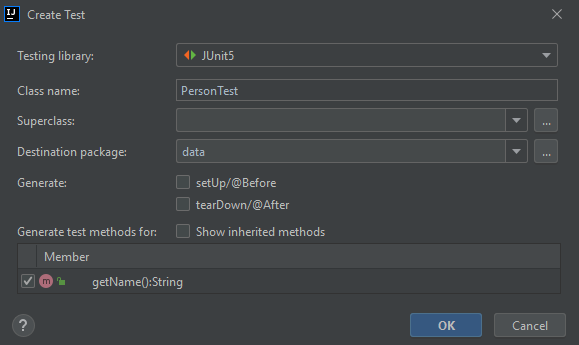
As you can see, in this case JUnit is automatically included in the project, and we only need to choose the method(s) for which we need to define the tests (getName method in this case).
The new test class will be automatically added to src/tests/java subfolder. We can fill the code of the test method with something like this:
package data;

import org.junit.jupiter.api.Test;

import static org.junit.jupiter.api.Assertions.*;

class PersonTest
{
    @Test
    void getName()
    {
        Person p = new Person("James");
        assertEquals("James", p.getName());
    }
}
Our project is now ready to be uploaded to a CI environment. Let’s go on.
2. Using continuous integration with Circle CI
As we have said before, we are going to use Circle CI as our CI tool. First of all, we need to sign up in Circle CI home page and enable this tool in our GitHub account. Then, we can easily upload our Java projects with their tests included, and see how it works.
2.1. Circle CI setup
First step in order to use Circle CI is to sign up in its official web page, using our GitHub account.
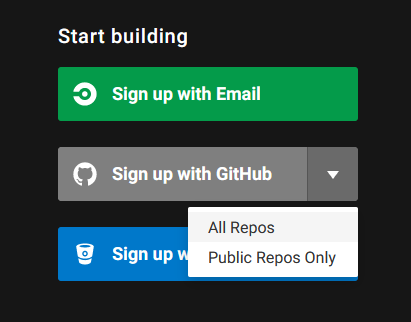
Then, we need to allow CircleCI from our GitHub account to access our repositories (either public ones, or all of them).
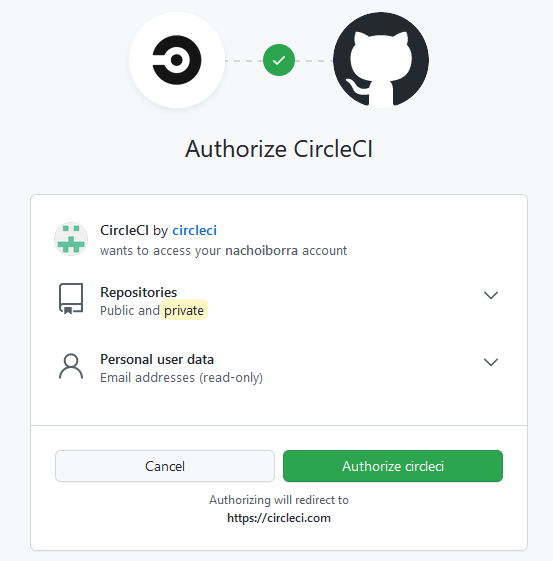
NOTE: this first step must be done only once, the first time we need to associate our GitHub account with Travis. Then, every repository that we want to include in our continuous integration flow can be automatically added.
2.2. Adding new projects to our CI flow
If we want to add any project to a continuous integration flow, we just need to follow these steps.
Create the project
We have already done this step with IntelliJ and Gradle. But, before going on, we could also include a Circle CI configuration file in our project, just to ease next steps. Create a directory called .circleci in the root folder of the project, and include a config.yml inside this folder like the one that you can get here.
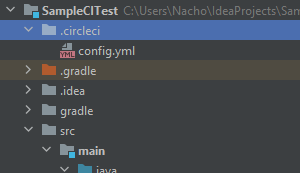
This .yml file tells Circle CI how it should compile the project and run the tests using Gradle.
Upload the project to GitHub
Here you can see how to do it but, to sum up, we need to go to VCS > Share project on GitHub, and then choose the repository name (we may need to enter our credentials if we haven synchronized IntelliJ wigh GitHub yet).
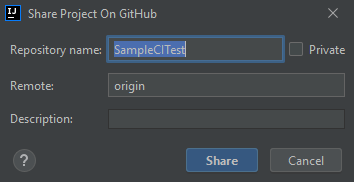
You will be asked to do an initial commit and push with the files of the project.
Setup project in Circle CI
Then, go to Circle CI projects page of your account and choose the project you want to manage.

Click on the Setup Project button, and choose the Fastest option. As you have manually added the config.yml file to your project, Circle CI should automatically detect this file in the master branch.
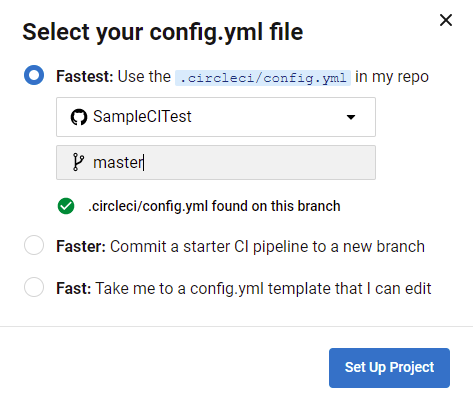
And that’s all. Now your continuous integration process is ready. In the Dashboard of Circle CI you can see the history of all the tests performed:

2.3. Making changes to the project
Whenever we make any change to the project, or add new tests, Circle CI will automatically launch them, so you will see a new entry in the dashboard. For instance, let’s add this new assertion to the getName test method. Notice that this assertion will make the test fail:
package data;

import org.junit.jupiter.api.Test;

import static org.junit.jupiter.api.Assertions.*;

class PersonTest
{
    @Test
    void getName()
    {
        Person p = new Person("James");
        assertEquals("James", p.getName());
        assertEquals("John", p.getName());
    }
}
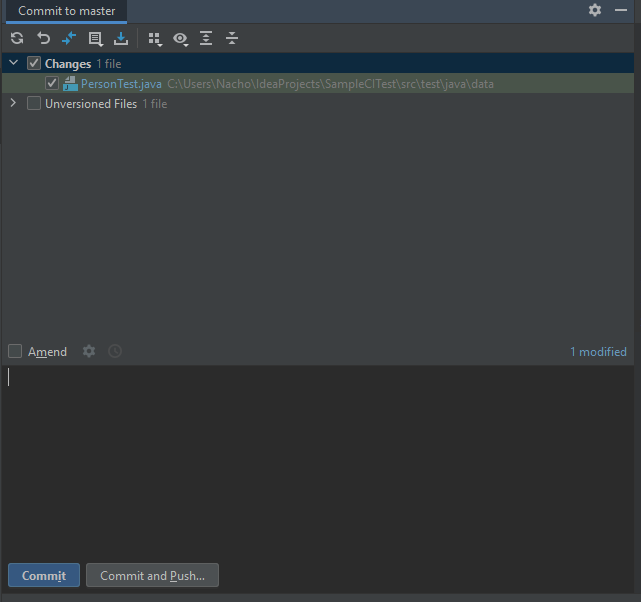
Commit and push the changes to GitHub (from Git > Commit menu, choosing the Commit and Push button):
Now you can see these new tests running automatically on Circle CI dashboard:

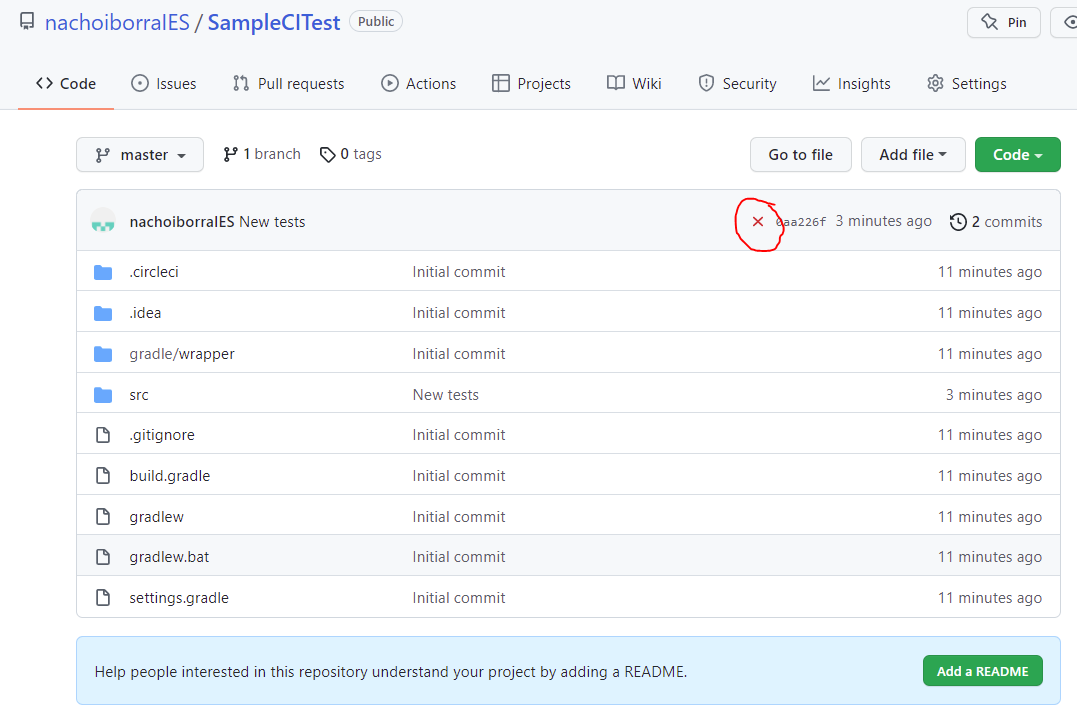
Also, you will get an e-mail to your GitHub account every time a continuous integration is launched and failed, so you can see the results. Besides, these results are also available from GitHub. If you choose the appropriate repository and branch (master, in our case), you will see an icon next to the last commit information (red if any test has failed, green if everything is OK):
If we don’t want to include Circle CI features in a project any longer, we go back to the projects section in Circle CI web site and choose Unfollow project

Exercise 1:
Follow the steps shown in this section to create the SampleCITest project with the
Personclass. Upload the initial version of the project to GitHub (includingconfig.ymlfile for Circle CI) and then add new changes to bothPersonandPersonTestclasses to include new methods and tests (for instance, thesetNamemethod). See how the Circle CI dashboard automatically updates with every new test that you include in the project.